Showing posts with label beadwork. Show all posts

Friday 23 December 2011

Season's Greetings!

Around this time every year I like to look back on the previous 12 months in my little beady world.  As I ponder, I try and work out whether I met my goals for the year and I smile when I think of how some of those goal posts had to be moved time and time again.  I like to think about the lessons learned and the ones that I need to re-take and I also like to reflect on all the little unexpected twists and turns that life threw at me.  I also spend time dreaming about the promise of the coming year.  I have some plans in place, but really, anything could happen and although that thought makes part of me very nervous, the rest of me finds that an exciting prospect - I have beads and I can make anything, I have life and I can do anything.  Thank you to each and every one of you for your support throughout 2011 and whatever your beliefs, I wish you a wonderful holiday season and a 2012 full of health, happiness and hope!


See you in 2012!

Kerrie x

Wednesday 9 November 2011

The Guardian of the Garden!

A couple of weeks ago I visited the Harrogate bead fair and although I didn't really need any more beads, I was on the look out for some unusual components that I could perhaps incorporate in the Midnight Garden exhibition.  One of the things that caught my eye was a little Amazonite owl from Meena's Gems.  I was drawn to him immediately, but as he's a carved ornament and not a bead, I wasn't sure how I could combine him with my beadwork - but I gave him a home anyway, just in case.  As soon as I'd finished the Dragon's Egg ring I set to work on creating a piece that my owl would be happy with.  I imagined him nestled in a hollow in an old tree, snuggled deep inside, half hidden but still able to peer out of the foliage to keep an eye on what exactly goes on in the garden at midnight.  It was also important to me to make sure that he would still be able to fly whenever the mood took him (when I'm not looking of course!) and so here is the result of my work for the last 2 weeks - Asio, Guardian of the Garden!  I think he looks right at home, what do you think?


Wednesday 9 March 2011

English Rose

Several months ago, I was asked to create a necklace project for the beautiful new German beadwork magazine Perlen Poesie -  'English Rose' is the result of my experiments and the instructions can be seen on page 58 of the latest issue of the magazine.  Once again, this is a necklace that can be worn in several ways as the 'rose' is removable and so you can change the colour of the flower, wear it high at the neck or lower down, knot or plait the stems or let them hang freely and cluster gently beneath the rose.  This is quite a difficult piece to photograph as it is very long, but the following picture shows the soft drape of the stems and leaves as they are held in place by the flower.


The next picture shows the 'Silver Shadow' version of the necklace and also highlights the silver spines on the leaves.


The following picture shows the 'Burgundy Bloom' version of the necklace and the strong red provides a real contrast to the pale pink version - change them to suit your mood or your outfit!


Another view of the true 'English Rose' version of the necklace, showing the rose worn high at the neck with the stems gently braided.


And finally (now that I have learnt how to make them!) a collage of the 'English Rose Collection'.


I hope that you like the new necklace and that you will enjoy making your own - as always, feel free to send me a picture of your own version and I will gladly add it to the 'Readers' Gallery' page on my website.  The Bead Shop (Nottingham) Ltd stock this magazine or you can subscribe directly via this page of the magazine's website.

Thursday 9 December 2010

Popper Flowers Workshop in Hamburg!

Well this has been a long time in the planning stages, but I am finally able to tell you that earlier this year, I had the honour of being invited to teach at the first Bead Art Fair in Hamburg (Germany) in 2011 - and of course I said 'Yes please!' to that fantastic offer.  Since then, all of the teachers have been busy preparing their workshop projects and the classes have now been announced and are available for you to book.  The fair is on the 20th and 21st of August 2011 and promises to be a huge and exciting event with lots of exhibitors and classes.  Workshop places are limited (I am offering one class on Saturday and one on Sunday and each has only 10 places available) and I have heard that they are already filling up, so if you would like to book a place, please hurry!


My workshop project is called Popper Flowers!  In the class I will show you how to use a combination of stitches to create two different coloured flowers with a single base of green leaves.  The flowers are interchangeable and so you can pop a flower on, pop a flower off and change them to suit your mood.  The project is to make the Popper Flower into a pendant that you can then hang from a necklace of your choice, but you could just as easily turn your Popper Flower into a brooch, a bracelet, a ring ... anything you fancy really!


The price of the workshop will include the materials (excluding Fireline which you will need to bring with you) and I am offering 3 colour choices.  Kit A has a pink and a purple flower, Kit B has a yellow and a blue flower and Kit C has a black and a white flower - each kit has a different coloured leaf base.  This is an advanced project and will not be finished in class, but we will cover all the tricky bits in class and I will also be providing comprehensive instructions for you to take home to complete your Popper Flowers.  The class will be in English but there will be a German translator on hand.


I think this is going to be a really fun class and I would love to meet you, but don't forget to take a look at all of the other wonderful workshops being offered by a host of great international teachers.  The fair is organised by the German magazine Perlen Poesie and full details can be found on their website be sure to check out all the links under the Messe/Show 2011 tab.


You can see all the available workshops here and the booking form for all workshops is here.  See you at the Bead Art Fair!

Monday 29 November 2010

It's official ...

... I teach beadwork!  This has been a long time coming, but I finally have my first workshop under my belt with several more in the pipeline.  My first class was held at The Bead Shop (Nottingham) Ltd. and it will definitely be a day to remember as we woke up on the morning of the workshop to be greeted by this scene;


We didn't feel that it was safe to drive, but fortunately the buses were still running and so I made it to the workshop on time, and so did the staff at the bead shop and my four lovely eager students.  Although it was a full day workshop, we knew that it wouldn't be possible to complete the Double Daisy project in class, but everyone got stuck in, choosing their colours and juggling peyote stitch, ladder stitch and brick stitch until little petals began to appear.  Keeping my first workshop small with only four students, meant that I could spend lots of time sitting with each student individually, checking that they were on track and also chatting about their favourite bead stitches and admiring some of the beautiful beadwork that they had brought with them.  As well as a lovely spacious (and warm!) workshop area, the bead shop also provided plenty of tea and biscuits which all made for a really enjoyable day before we all had to wrap up and head off home in the snow!


This project was designed exclusively for The Bead Shop (Nottingham) Ltd. but now that the workshop has finished, you can buy the comprehensive 18 page tutorial via my website and make your own Double Daisy!  The instructions cover how to make the finished daisy and include some ideas on ways to use it; you might like to turn yours into a pin/brooch, create a loop of beads at the back to turn it into a pendant or sew it onto finished beadwork or ribbon (as in the picture below) to make a glamorous choker or wrist corsage!


Whatever you decide, have fun and don't forget to send me a picture!  The pdf of the instructions is available for purchase here and will be delivered by email.

Tuesday 6 April 2010

Growth and change ...

It's funny how things change.  I remember back in around 2004, I hadn't been beading for very long and believe it or not, I didn't really know where to buy beads.  I used to buy packs of Mill Hill beads from a large DIY store, and as these were really only meant to embellish embroidery projects, they came in tiny packs and it worked out very expensive if you wanted to make a large beaded project.  Then I heard about a new family-run on-line bead shop that was opening and an open day that they were going to hold at the owner's house.  I went to that first event and had a wonderful time rummaging through the tubes of beads and asking quite simple questions, like the difference between a seed bead and a cylinder bead, and what pliers I would need to create wrapped loops.  That bead shop was Beads Direct and although the company has now changed hands, I have been buying beads from them ever since they first opened.  I have always received excellent, fast and friendly service, with the beads usually arriving the day after ordering them and all beautifully packaged.


Beads Direct has expanded a great deal since those early days and I have grown too, so it was a lovely surprise when Claire, the marketing manager, contacted me to see if I would be interested in doing some work together, which of course I am more than happy to do.  I think just about every one of my published projects, over the years, has used at least some beads from Beads Direct and you can see their great range of seed and cylinder beads here.  Be sure to check out the other goodies they have to offer though as well, such as crystals, pearls, semi-precious stones and a great selection of clasps.  There's lots to look at on their website too, like a collection of 'how to' videos and they also have their own blog - Claire recently asked me some questions about how I came to start working with beads and you can read my answers here.  We are discussing the details at the moment, but one of my projects will soon be available from the Beads Direct website, so keep your eye on their website and blog for details!

Monday 8 March 2010

Core Beaded Beads ...


Nearly two years ago, when I first saw some beautiful silver core lampwork beads, I had the idea that I would like to try and replicate them in beadwork.  It's a very simple idea, but for some reason it has taken me this long to find the right method and the best stitches to 'build' these.  I use the word 'build' because beading (especially sculptural beadwork) can be a bit like that sometimes - you know you want to build a house, but what bricks to use?  I tried many different stitches and have a big bag full of beaded beads of various shapes, sizes and colours that just weren't quite right.  Some were the wrong shape or size and some wouldn't hold their shape enough and were just a little bit too 'squishy', but finally, I think I am happy with the end result and here are my Core Beaded Beads.


Of course this type of glass bead is very popular at the moment and you often see them threaded on to silver snake chains, so I thought I would complete the effect and make one of those too.  I made a bracelet length and a necklace length and tried out some different colours and patterns.  That is a whole lot of stitching but I am pleased with the results.  I named the first one 'Warrior Queen' as the gunmetal beads reminded me of chainmaille and the metallic purple made me think of royalty.  I stuck with the theme and so went on to make 'Elven Queen' in greens and purples with a gold core and then 'Tudor Queen' in black and white.  These are really satisfying beads to make, they only take a couple of hours each, you can make them in an almost endless variety of colours and they are very easy to wear.  My current favourite way to wear these is to string a few of them onto a piece of velvet ribbon and tie it round my wrist as it stops the beads rolling around.


If you would like to make your own Core Beaded Beads, the pattern is for sale on my website. 

Monday 8 February 2010

The journey continues ...

Ooops!  I must apologize for another late blog entry.  I have been busy making lots of new things (honest!) but I just haven't got round to taking pictures of them.  I have also been working on some ideas for possible contest entries and some of those will need to stay under wraps for a little while longer.  Anyway, the big news that I hinted at last time was that it looks like I am going to take the plunge and try my hand at teaching.  When I first started beading, I never imagined that I would sell anything, let alone have a project published and the thought of teaching seemed like an impossibility to me, but step by little step, things are progressing.  Despite my internet persona, I am actually a nervous bunny who lacks confidence, but this opportunity has presented itself to me and I know that I need to at least give it my best shot.  I think the thing that I have come to realise is that although I believe in the power of positive thinking, I am also a realist and no amount of visualising myself as a confident tutor with a rapt class of students is going to make it real.  I am nervous, I will shake, I will stutter, I will drop beads, but that is the way I am, and I am hoping that embracing all of those sometimes annoying human traits rather than denying them, will make for a fun and friendly class.  The details are still being worked out, but hopefully I will be teaching the versatile flower shown below at The Bead Shop (Nottingham) Limited later this year and I will post exact details here when I know them.

Oh and before I go, I wanted to show you this Treasury West I managed to grab on Etsy on Friday. I saw this beautifully bright bag my friend Claudette of Moonflower 20 Creations made, and I found it so uplifting on a gloomy day, that I went off in search of other cheerful items to complement it and this was the result ...


Right, that's it for this week.  I have some beads to order and then it's back to beading samples, writing instructions and working on the dreaded diagrams.  See you next week!

Friday 18 December 2009

Lunar Lily!

I've finally finished the second version of my Lily Cuff which has taken a lot longer than anticipated due to the poor light here in the UK at this time of year.  I prefer to bead by daylight (I do have some daylight simulation bulbs but they are just not the same) and so some days there have only been 4 or 5 hours when the natural light was bright enough to bead by.  Still, it is finished now and I am quite pleased with the result.  This cuff is worked entirely in one colour of seed beads and reminds me of a lily in a moonlight garden - hence the name!


I'm not going to write much this week, I thought I would let the pictures do the talking, but I wanted to let you know that this will be the last blog post from me for this year.  I intend to try out some more ideas over the holiday period, so I hope to have pictures of new work to share with you early in the New Year.  Whether you celebrate Christmas or not, I hope you all have a great holiday and I wish you health and happiness for the New Year.  I look forward to catching up with you all in 2010!

Tuesday 8 December 2009

A big crafty circle!

This last week has reminded me how great it is to be part of the huge on-line crafting community.  First of all, I posted on my 
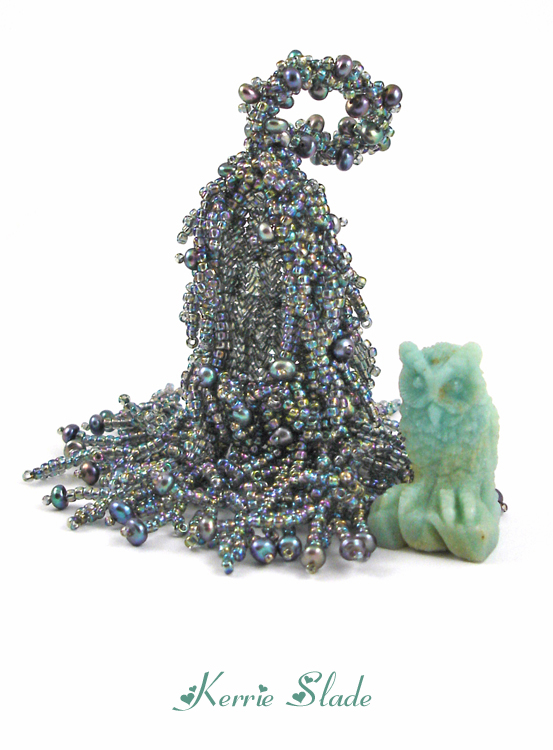
facebook page that I was struggling with getting a good picture of my latest piece 'Lily Cuff'.  No matter how hard I tried, the orange beads just didn't want to play and I ended up with a fuzzy middle and a grey background.  Then my friend Sue from Beadweaver came to the rescue and enhanced the photograph for me.  It's still not as sharp as it could be (after all Sue only had my original shot to work with) but the picture looks a lot more professional than it did, so I am very grateful to Sue who also gave me some top photography tips.  I'm currently making another cuff in a completely different colour, so let's hope this one behaves itself!

Then I found out that two of my crafty friends have included one of my pieces in their Etsy Treasuries.  Claire of Rhodes Annals Designs added my Flamenco Flowers choker to her Treasury and Ileana of 
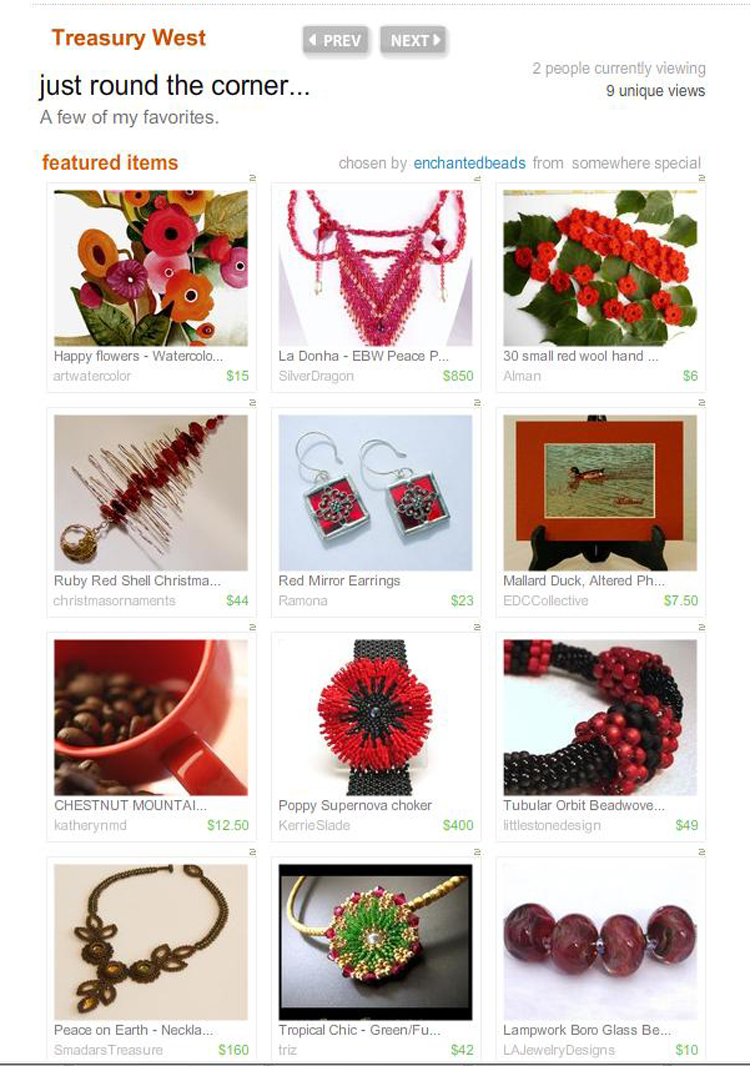
Enchanted Beads featured Poppy Supernova choker in her Treasury West.  Thank you ladies!


I also discovered that Sig Wynne-Evans of Beadedbear passed the 'Superior Scribbler' blog award on to my blog.  Thanks for the honour Sig and I'm glad you enjoy my blog :0)


The five blogs I am passing the award on to are;


If you want to play the game the rules are as follows;

* Each Superior Scribbler must in turn pass The Award on to 5 bloggy friends.

* Each Superior Scribbler must link to the author & name of the blog from whom he/she has received the award.

* Each Superior Scribbler must display the award on his/her blog and link to this post which explains the award.

*Each Blogger who wins The Superior Scribbler Award must visit this post and add his/her name to the Mr. Linky List - that way, we'll be able to keep up to date on everyone who receives the award.

* Each Superior Scribbler must post these rules on his/her blog.


So you see, these are just a few of the reasons why I enjoy being part of the international crafting community.  You could view it as cold networking, self-promotion, climbing, whatever you want to call it.  But, if you really get involved, there is a lot of fun to be had along with the rewards of making friends, learning lessons, seeing lots of amazing work and helping each other out.  And to me, all of that makes the modern, uncertain and often scary world seem a much better place.  See you next week!


Thursday 1 October 2009

Crazy Daisies!


Not much exciting new beadwork to show you this week I'm afraid, just a little pair of earrings I've made as a present to myself to match a new top. They really are as bright and colourful as the picture shows and I call them my Crazy Daisies! The centre is a hot pink Miracle Bead and the petals use a sparkling shade of lilac lined cylinder beads.


I also wanted to tell you about the new issue of Bead magazine that is out this week. This is the third anniversary issue and there is an interesting 'Where are they now?' article which looks back at some of the artists that have been featured since the magazine started. It's fascinating to read what having their profile in this internationally available magazine meant to the various designers and how their work has evolved since that time. My profile originally appeared in issue 12 of the magazine and was quite a bold move for me. Here is what I said in my profile update - click on the picture to enlarge it (used with kind permission of Ashdown).


My mistletoe earrings are also shown in the 'coming next issue' section of the magazine and although I have shown them in this blog before, I've added a refresher picture below. That reminds me, there will be no new blog entry for the next 2 to 3 weeks, but if you click on the links under 'Blog Archive' there are 63 previous posts - feel free to make yourself at home and have a look back through my beading history. I hope to have some pretty new pictures to share with you before too long ♥

Wednesday 23 September 2009

Back to nature ...


I had a flash of inspiration last week and saw a finished piece of beadwork dangling tantalizingly before my mind's eye. It was black, it was shiny, it was unusual and it wasn't flowers! I spent the best part of three days trying to turn that vision into reality, but right now it seems it's not meant to be. I haven't given up on the idea though and so I have put the poor sad thing to one side until I am ready to try again. In the meantime, I went back to what I know and created another flower pin. This one uses all cylinder beads rather than the mix of seeds and cylinders that I used for the daisies and I chose hex-cut Delicas in purple iris to create a deliciously dark flower which I have called Nightflower.


Another recent creation that I forgot to show you last week is Bluebell Wood necklace which is a bit different to my usual style of work. I created my bluebell earrings back in July and always meant to make a necklace to match but it didn't quite work out that way. If you know beads and beadwork, you will understand that sometimes the beads 'talk' to you and these little bluebells didn't want to be hung on a silver chain or attached to a beaded rope. They wanted to be wild and free, pretty, but a little bit rustic and so I searched for some wood to incorporate to make them feel at home and mixed it with some coloured leather and sterling silver. What do you think? I rather like it :0)


Wednesday 2 September 2009

Bunches of flowers ...


I've just got back from a lovely week staying with my parents on Romney Marsh which is where I grew up. It is on the south-eastern tip of England and seems to have a little climate all of its own. While we have had a very wet summer here in the Midlands, Mum has complained about everything in the garden being parched through lack of rain. The garden still looked lovely to me though, full of beautiful floral beady inspiration and we spent many happy hours sat in the garden eating Mum's home-baked scones with jam and cream and also walking miles and miles to help balance out the calories!


Beads were the first thing I packed for my trip, but I didn't actually do any beading for the whole week. I spent lots of dreamy time thinking about beads and what designs I might like to try next though and so I'm full of enthusiasm now. I didn't take any pictures of my trip either, but I thought I'd share a picture of Mum's late birthday present which I took with me. It's made using the same principle as my recent daisies but it has different petals. I originally set out to make a Gazania, which is one of Mum's favourite flowers, but I ended up with too many small petals for it to be quite right - still Mum loves it and it looked great pinned on her navy cardigan on a trip out together!

Tuesday 18 August 2009

Daisy Days ...


I've been busy experimenting with my latest flower design and I'm really enjoying seeing what different effects can be achieved by making a few small alterations to the pattern or just by changing the colours.


I must admit that although I love the finished look of beadwork, sometimes I do get a little bored when making intricate pieces as they can be quite monotonous. Some days that's a good thing and can create a lovely meditative state, but other days I have to be disciplined and make myself sit down and finish something rather than moving on to the next idea. Although these flowers take a couple of days each to complete, I'm finding them really fun to make and they hold my interest as there are several different stages to them and they use at least five different stitches. I think they have lots of potential to either just be a fun bright fantasy flower or to look like a variety of realistic flowers such as Gerberas or Shasta daisies, depending on what colours are used - next on my list is a Michaelmas Daisy!

Thursday 30 July 2009

Sunshine on a rainy day ...


Following on from my 'Hello Yellow!' blog entry, I've finally made myself a piece of yellow jewellery to wear. I wanted to make something really bright and cheerful to make up for the wet weather we are having here in central England right now - so what better than a sunflower?


Jean Power's new blog 'Colour Challenge' really got me thinking about why I haven't used many yellow beads in my work so far and so I bit the bullet and chose the brightest of yellow cylinder beads to experiment with. I also used a lovely shade of shiny brown beads for the centre and bright green beads for the stem and leaves. This is quite a departure from my early work which was often in muted shades of pinks and purples with dark greens, but hey - if nature can do it, why can't I? I'm really pleased with the way this has turned out and although it's only three inches high, I managed to squeeze in forty-eight little petals and broke three needles in the process! I've made two of these so far, one is for sale in my Etsy shop and the other one is for me - it makes me smile every time I look at it and I'm hoping it will spread a little happiness when I wear it out and about.

Friday 10 July 2009

Fifteen Flowers ...


My recent work on a new range of floral earrings meant I needed to make much smaller flowers than normal. I find it quite a challenge to get in lots of detailed shaping and still keep the flowers dainty enough to be wearable. Last weeks bluebells were made using size 11 cylinder beads and each bluebell is only 1½cm high. This lead me to want to make not necessarily even smaller flowers but to be able to get more detail in - hence I have splashed out on some delicious new size 15 seed beads in a range of gorgeous colours. As you can see, pinks and greens are the predominant colours I have gone for and these tiny little beads look as though they will be perfect for my future experiments with all things floral. Looks like I will finally have to give in and wear those glasses I have been avoiding for months though!


On the subject of bluebells, it's expired now, but I managed to create another Etsy treasury this week 'She sells bluebells' - which of course I do! I am not comfortable including my own work in treasuries and so I searched for other artist's work with 'bluebell' in the title and look what beautiful items I came up with!